To the uninitiated, “Black Anodize” sounds like a purely cosmetic specification. Our previous project manager, aiming to save the client costs and reduce lead time, had routed the job for standard MIL-A-8625 Type II sulfuric acid anodizing. The parts looked pristine—a deep, jet-black finish that was smooth to the touch and aesthetically perfect.
However, the disaster struck the moment the client’s engineering team attempted to press-fit the steel bearings onto the shafts. The soft Type II coating didn’t just fail; it sheared off completely, crumbling like dried paint. The underlying aluminum, stripped of its protection, galled immediately against the hardened steel bearing race. The interference fit, calculated down to the micron, was destroyed. The entire batch was scrap. The root cause? A fundamental misunderstanding of the difference between Type II (Decorative) and Type III (Hardcoat) anodizing.
This is a scenario we at JXD see play out dozens of times a year. Mechanical engineers spend weeks optimizing geometries, running Finite Element Analysis (FEA) for stress loads, and selecting the perfect alloy, only to treat surface finishing as an afterthought. They specify “Anodize” without realizing that they are making a choice between a part that lasts ten years and a part that fails in ten minutes.
As JXD’s Chief Application Engineer, I am writing this report to tear down the datasheets and expose the reality of anodizing from the perspective of the machine shop floor. We will move beyond the basic definitions and dive deep into the tribology, the electrochemistry, and the critical Design for Manufacturing (DFM) calculations you must make before you cut a single chip. We will discuss why Type III is not just “thicker” but fundamentally different in microstructure, why you must machine your parts to different dimensions depending on the coating choice, and why asking for “Apple White” on a hardcoat part is physically impossible.
This report is your guide to mastering the engineering reality of surface treatment and coating technologies.
The Electrochemical Reality: Beyond “Dip and Dye”
To understand why Type II and Type III coatings behave so differently in the field, we must first understand what is happening inside the tank. Unlike paint, powder coat, or nickel plating—which adhere to the surface—anodizing is an electrochemical conversion process. We are forcing the aluminum substrate to consume itself to build a ceramic-like layer of aluminum oxide ($Al_2O_3$).
2.1 The Fundamental Mechanism
When aluminum is immersed in an acid electrolyte (usually sulfuric acid) and subjected to an electrical current, oxygen ions are released at the anode (the aluminum part). These ions react with the aluminum atoms to form aluminum oxide. This reaction is a competition between two simultaneous processes:
-
Oxide Formation: The electrical current drives the growth of the oxide layer.1
-
Dissolution: The sulfuric acid electrolyte naturally eats away the oxide as it forms.
The structure of the resulting coating depends entirely on how we balance these two forces. The coating grows in a hexagonal cellular structure, with each cell containing a central pore. It is this pore structure that defines the coating’s properties.
2.2 Process Variables: The Difference in the Tank
| Parameter | Type II (Decorative/Standard) | Type III (Hardcoat/Engineering) | The Engineering Implication |
| Bath Temperature | 68°F-72°F(20°C-22°C) | 32°F-36°F(0°C-2°C |
Type III requires massive refrigeration capacity. The cold bath freezes the oxide growth, preventing the acid from dissolving the outer surface as it forms.3 |
| Voltage | 12V – 24V DC | 24V – 100V DC (Ramped) |
High voltage in Type III creates a much higher energy state, forcing a denser, tighter pore structure. This density is the source of the hardness.6 |
| Current Density | 12 – 15 amps/sq. ft. | 24 – 40 amps/sq. ft. |
Higher energy input builds the layer faster but generates immense localized heat at the part surface, risking “burning” if racking is poor.8 |
| Electrolyte | Sulfuric Acid (~180g/L) | Sulfuric Acid + Additives (e.g., Oxalic) |
Additives in Type III baths help suppress dissolution and prevent burning at high voltages.10 |
| Agitation | Moderate Air Agitation | Vigorous Mechanical/Air Agitation |
Type III requires aggressive agitation to remove the heat generated at the anode surface; otherwise, the coating will dissolve or burn.11 |
JXD Insight: The critical takeaway here for a mechanical engineer is the energy density. Type III is a violent, high-energy process. Because we are pumping up to 100 volts and high amperage into the part, the connection points (racking) are critical. For Type II, we can often use simple titanium spring clips. For Type III, we essentially have to bolt the part to the rack to carry the current without arcing. If your part design does not have a threaded hole or a designated “non-cosmetic” area for a heavy-duty contact, we may have to add one, or risk rejecting the part due to contact burns.12
Hardness and Wear Resistance: The “Case-Hardened” Aluminum
The primary engineering justification for specifying Type III Hardcoat is to transform relatively soft aluminum into a wear surface that rivals tool steel.
3.1 Understanding the Scales: Rockwell C vs. Vickers
It is technically difficult to measure the hardness of a thin ceramic coating on a soft metal substrate using a standard Rockwell C macro-indenter. The heavy load of the HRC test would simply punch through the coating and measure the soft aluminum underneath, giving a false low reading. Instead, we use Vickers Microhardness testing (HV) and convert the values.
-
Type II Anodize: Typical hardness is 300-400 HV, which roughly correlates to soft steel. It offers decent scratch resistance against fingernails or plastic but will gouge easily under metal-on-metal contact.
-
Type III Hardcoat: Typical hardness is 900-1100 HV. When converted, this approaches 60-70 Rockwell C (HRC).13
To put this in perspective:
-
Untreated 6061-T6 Aluminum: ~15 HRC (Very Soft)
-
Hard Chrome Plating: ~65-70 HRC
-
Nitrided Steel: ~65-70 HRC
-
Type III Hardcoat: ~65 HRC
This means a properly applied Type III hardcoat is harder than the stainless steel blade of your pocket knife. It essentially creates a ceramic “exoskeleton” for the aluminum component.
3.2 The Taber Abrasion Test (MIL-PRF-8625F)
Hardness is not always synonymous with wear resistance, but in the case of anodizing, the correlation is strong. The industry standard for verifying wear resistance is the Taber Abrasion Test. In this test, a coated panel is rotated under weighted abrasive wheels (typically CS-17 wheels with a 1000g load) for a set number of cycles, and the weight loss of the coating is measured.
-
Type III Specification: The coating must not lose more than 1.5 mg of weight per 1000 cycles.15
-
Comparative Performance: Under the same conditions, bare aluminum would lose over 500 mg—a difference of nearly two orders of magnitude.13
-
Type II Limitations: There is no wear resistance specification for Type II in the military standard because it would fail almost immediately under the abrasive load of the Taber wheels.15
Real-World Scenario:
Last year, we engineered a housing for a pneumatic piston assembly for a US automation client. The original design utilized a 304 stainless steel sleeve pressed into an aluminum body to handle the wear of the piston seals. This design was heavy and expensive to assemble.
The JXD Solution: We redesigned the unit as a single monolithic piece of 7075-T6 Aluminum, treated with Type III Hardcoat (0.002″ thickness) and impregnated with PTFE (Teflon).
The Result: The hardcoat provided the necessary 65 HRC wear surface for the seals, while the 7075 core provided structural strength comparable to mild steel. We eliminated the stainless sleeve entirely, reducing the part weight by 40% and cutting assembly costs by 25%. The hardcoat has now survived over 2 million cycles in field testing with negligible wear.
Dimensional Engineering: The 50/50 Rule & Tolerance Stack-up
If there is one section of this report that you print out and tape to your monitor, let it be this one. The failure to account for dimensional growth in Type III anodizing is the single most common reason for part rejection at JXD.
Mechanical engineers often treat anodizing like a “zero-thickness” treatment or assume it adds thickness exactly like paint. Both assumptions are wrong and will lead to scrapped parts.
4.1 The Mechanism of Growth and Penetration
Because anodizing converts the aluminum substrate into oxide, the coating grows in two directions simultaneously:
-
Inward Penetration: The coating consumes the aluminum surface, eating “into” the part.
-
Outward Growth: Since aluminum oxide ($Al_2O_3$) is less dense and occupies more volume than the pure aluminum it replaces, the surface expands outward.
The Rule of Thumb: For every unit of total coating thickness, approximately 50% is penetration and 50% is outward growth.16
4.2 Calculating Machining Tolerances
Let’s apply this to a real-world precision application. Suppose you are designing a bearing bore with a finished diameter requirement of $0.5000″ \pm 0.0005″$. You specify MIL-A-8625 Type III, Class 1, Thickness 0.002″.
If you machine the part to the final dimension ($0.5000″$) and then send it to the anodizer:
-
The anodizer builds a 0.002″ total thickness coating.
-
Per the 50/50 rule, the coating grows outward by 0.001″ per surface.
- A bore has two opposing surfaces. Therefore, the total diameter change is:
$$2 \times 0.001″ = 0.002″ \text{ reduction in diameter}$$
-
Final Diameter: $0.5000″ – 0.002″ = 0.4980″$.
-
Result: The part is undersized by $0.002″$. The bearing will not fit. The part is scrap.
The JXD Engineering Protocol:
To achieve a finished dimension of $0.5000″$ with a 0.002″ hardcoat, we must machine the part to a “Green State” (pre-anodize) dimension.
-
Target Final ID: $0.5000″$
-
Required Growth per Side: $0.001″$
-
Total Diameter Reduction: $0.002″$
-
Machining Target: $0.5000″ + 0.002″ = \mathbf{0.5020″}$
We machine the hole to $0.5020″ \pm 0.0005″$. After the anodizing grows 0.001″ per side, the hole closes down to exactly $0.5000″$.
4.3 The Thread Nightmare
Standard threads (e.g., M6 x 1.0, 1/4-20 UNC) present a unique geometric problem. The growth does not just happen on the diameter; it happens perpendicular to the thread flank (which is at a 60-degree angle).
Geometry dictates that the change in Pitch Diameter is roughly 4 times the outward growth of the coating.16
-
If the coating grows 0.001″ per surface, the pitch diameter of your thread will change by approximately 0.004″.
-
This is enough to make a standard screw seize in the hole or strip the threads upon insertion.
-
Standard “Go” gauges will fail.
The JXD Solution for Threads:
-
Masking: The most common and safest approach. We plug the threaded holes with silicone or plastic plugs during the anodizing process. The threads remain bare aluminum and retain their original machined tolerance.
-
Oversized Taps: If the threads must be hardcoated (e.g., for corrosion resistance), we use special “H-Limit” oversized taps. For a 0.002″ hardcoat, we might use an H5 or H7 tap instead of a standard H2 or H3, deliberately cutting the threads loose so the coating brings them back into tolerance.
Surface Finish: The Roughness Trap and Machining Strategy
Another detail often omitted from engineering textbooks is that Hard Anodizing significantly roughens the surface finish. It is a crystalline growth process, and the crystals do not form a perfectly flat plane.
5.1 The Roughness Multiplier
A Type III coating typically increases the surface roughness (Ra) by a factor of 2x to 3x.20
-
If we turn a hydraulic piston shaft to a fine finish of Ra 16 µin and apply a 0.002″ hardcoat, the final finish might degrade to Ra 40-50 µin.
-
In a dynamic sealing application, this rough oxide layer acts like sandpaper, shredding the O-rings or lip seals and causing premature leakage.
5.2 Pre-Anodize Machining Strategy (The JXD Approach)
To counteract this phenomenon, we at JXD employ a specific machining strategy for parts designated for Type III anodizing. We must machine the surface to a significantly finer finish than the final requirement to allow “headroom” for the roughening effect.
Tooling Selection:
We do not use general-purpose carbide inserts for finishing these critical surfaces. Instead, we utilize specific Sandvik Coromant inserts designed for non-ferrous finishing.
-
Grade H10 (Uncoated Carbide): We prefer uncoated carbide grades like CCGX 06 02 02-AL H10 or VCGX 16 04 04-AL H10.23 Coated inserts often have a slightly rounded cutting edge due to the coating thickness. The H10 grade is ground to a razor-sharp edge, allowing us to shear the aluminum cleanly rather than “plowing” it, which minimizes sub-surface damage that can be exaggerated during anodizing.
-
PCD (Polycrystalline Diamond): For high-volume production or when we need ultra-precision (Ra < 8 µin), we switch to Sandvik CD10 diamond-tipped inserts.23
Cutting Parameters:
-
Speed ($v_c$): We run high surface speeds (1000 – 2500 m/min) to prevent Built-Up Edge (BUE), which can leave microscopic smears on the aluminum that manifest as defects in the anodize.
-
Feed Rate ($f_n$): We drastically reduce finishing feed rates. While a standard finish pass might be 0.15 mm/rev, for pre-hardcoat finishing we often drop to 0.05 – 0.08 mm/rev.25 This creates a surface with minimal scallop height.
Post-Anodize Processing:
For the most critical sealing surfaces (like aerospace hydraulic actuators), even this machining strategy may not be enough. In these cases, we employ a “Machine-Anodize-Hone” workflow:
-
Machine the bore with 0.001″ extra stock.
-
Apply Type III Hardcoat.
-
Hone or Grind the hardcoat back to the final dimension. This removes the rough peaks of the oxide crystals, leaving a super-smooth, plateaus-honed ceramic surface that is ideal for sealing.21
Materials Science: Alloy Compatibility
Not all aluminum is created equal in the anodizing tank. The alloying elements that make certain grades of aluminum strong (like Copper and Zinc) act as contaminants in the anodizing process.
6.1 The 6000 Series (e.g., 6061-T6)
-
Verdict: Excellent.
-
Behavior: Magnesium and Silicon are the primary alloying elements. They do not interfere significantly with the oxide growth. 6061 takes a uniform, hard, and aesthetically pleasing hardcoat (usually dark grey/bronze). This is the gold standard for general engineering applications.
6.2 The 7000 Series (e.g., 7075-T6)
-
Verdict: Good, but with caveats.
-
Behavior: High Zinc content. 7075 produces a very hard coating, often with a yellowish or gold tint naturally.27 However, the coating grows faster than on 6061. If you rack 6061 and 7075 parts on the same bar in the tank, the 7075 parts will “hog” the current and burn, or end up with a much thicker coating than the 6061 parts.
-
JXD Rule: Never mix 6061 and 7075 in the same anodizing batch.
6.3 The 2000 Series (e.g., 2024-T3)
-
Verdict: Difficult / High Risk.
-
Behavior: The primary alloying element is Copper (up to 4-5%). In the sulfuric acid bath, the copper dissolves preferentially. This creates “voids” in the coating and lowers the electrical resistance, causing the current to spiral out of control.
-
Result: Coatings on 2024 are often softer, thinner, and prone to “burning” (dissolving). They rarely achieve the full 60 HRC hardness.15
-
JXD Recommendation: If you need extreme hardness on a 2024 part, consider Electroless Nickel Plating instead of Hardcoat. If Hardcoat is mandatory, we must use a specialized pulse-rectification process and keep the coating thin ($<0.0015″$).
Color Selection: The “Apple White” Myth
This section addresses the most frequent conflict between Industrial Design (Aesthetics) and Mechanical Engineering (Physics). We often receive inquiries asking for “Type III Hardcoat in White” or “Type III in Bright Red.”
7.1 The Color of Type II (Decorative)
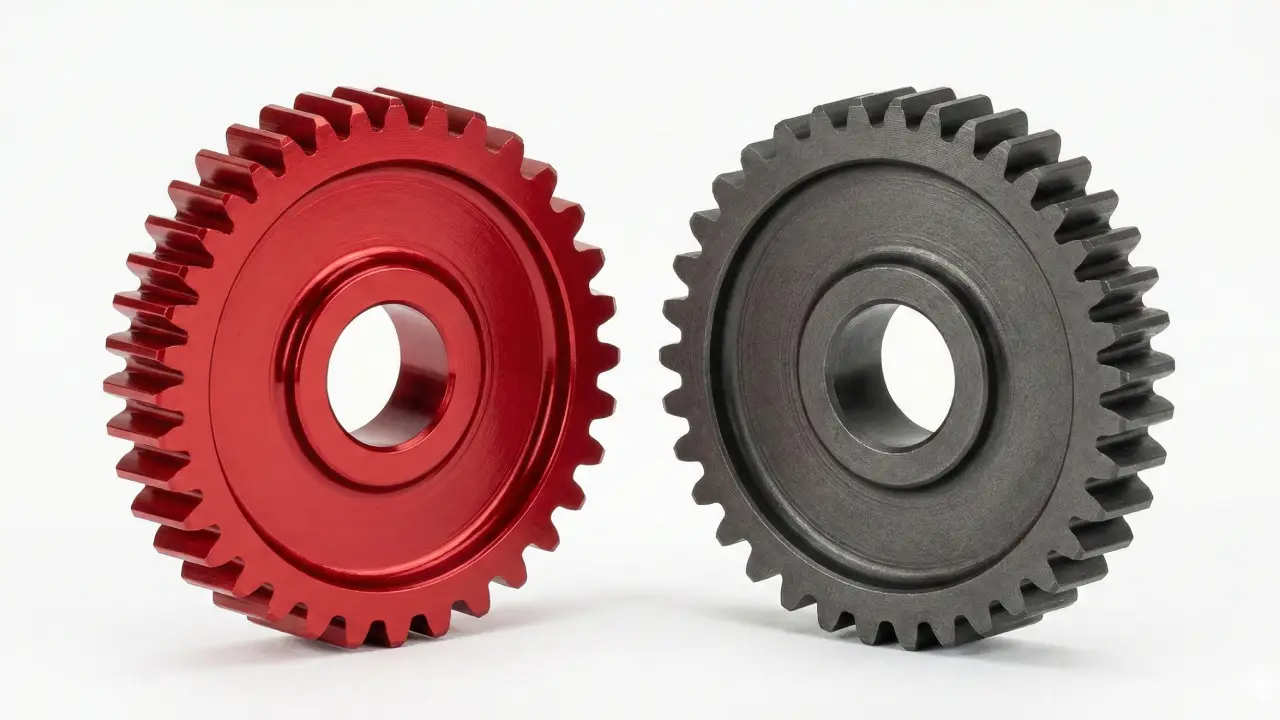
Type II coatings are naturally transparent and colorless (clear). The pore structure is open and large. This allows us to impregnate the pores with almost any organic dye—Red, Blue, Gold, Pink, Green. The underlying aluminum reflects light back through the dye, creating vibrant, metallic colors.
7.2 The Color of Type III (Hardcoat)
Type III coatings are not clear. Because the coating is so dense and thick, and because of the inclusion of alloying elements and sulfur in the oxide matrix, the natural color of the coating is Dark Grey, Charcoal, or Deep Bronze.7
-
6061: Dark Grey / Greenish-Grey.
-
7075: Yellowish-Bronze / Gold-Grey.
The Dye Limitation:
Because the “canvas” we are painting on is already dark grey, we cannot dye Hardcoat light colors.
-
White: Physically impossible. You cannot dye a dark grey surface white.
-
Yellow / Light Blue / Red: These colors will look muddy and dark. A bright “Ferrari Red” dye applied to hardcoat will look like “Dried Blood” or “Burgundy.” A bright blue will look like a dull “Navy Blue”.30
-
Black: This is the only color that works perfectly with Hardcoat. The black dye saturates the dark grey background, creating a uniform, matte black finish.
Case Study: The “Medical Grey” Issue
We recently collaborated with a German medical device manufacturer on a handheld surgical navigation tool. The industrial design team specified “Medical White” (RAL 9003) to convey sterility, but the engineering team specified Type III Hardcoat for durability against sterilization cycles.
We had to halt the project at the DFM stage. We explained that Type III would result in a dark grey instrument, not white.
The Resolution: We split the design. The internal structural chassis remained Type III Hardcoat (Grey) for durability. The external cosmetic covers were changed to Type II Anodize (White is still difficult, but clear silver is easy) or, in some cases, replaced with Passivated Stainless Steel or coated with a medical-grade ceramic paint over the anodize.
Medical Device Sterilization: The High-pH Killer
For our clients in the medical sector (ISO 13485), standard anodizing presents a fatal weakness when exposed to modern hospital sterilization protocols.
8.1 The Alkaline Attack
Hospitals use automated washer-disinfectors that utilize aggressive alkaline cleaners (like neodisher® FA) with a high pH (often > 10) to dissolve blood proteins and organic residue.
Aluminum oxide is amphoteric—it dissolves in both strong acids and strong bases.
Standard Type II Anodize, and even standard sealed Type III, will be attacked by these high-pH cleaners. The coating will fade, become sticky, and eventually strip off completely, exposing the raw aluminum substrate after just 10-20 cycles.32
8.2 The Solution: Sterilization-Resistant Anodizing
If you are designing a reusable medical device, you cannot simply specify “Type III Anodize.” You must specify “Sterilization-Resistant” or “High-pH Resistant” anodizing.
We utilize specific sealing chemistries for these applications:
-
Proprietary Sealants: Technologies like Sanford Process’s MICRALOX® chemically alter the crystalline structure of the seal to resist pH levels up to 13.5.33
-
Extended Nickel Acetate Sealing: A traditional method involving prolonged immersion in hot nickel acetate, though this is less effective than proprietary methods against the most aggressive cleaners.
JXD Warning: If your drawing says “Anodize Type II” and the part goes into a Steris washer or Autoclave, it will fail. You must consult with us to select a sterilization-compatible process.
Cost and Logistics: Why is Type III So Expensive?
We often face the question: “It’s just dipping the part in acid; why is the quote for Hardcoat 3 times higher than Type II?” The answer lies in the energy and time intensity of the process.
-
Energy Consumption: Type III requires high voltages (up to 100V) and high current densities. The electrical draw on our rectifiers is massive compared to the low-voltage Type II process.
-
Refrigeration Load: The reaction generates immense heat. To keep the bath at $32^\circ F$ ($0^\circ C$) while pumping kilowatts of energy into it requires industrial-scale chillers running at full capacity. The energy cost for cooling is often higher than for the anodizing itself.9
-
Tank Time: A typical Type II cycle is 15-20 minutes. A Type III cycle to build 0.002″ thickness can take 60 to 90 minutes. This effectively triples the “rent” of the tank space.37
-
Racking Labor: As discussed, racking for Type III is not a simple “clip and go” operation. It requires bolting, custom titanium fixtures, and careful masking of contact points. The labor time for racking and unracking is significantly higher.38
JXD Technical Comparison Matrix
To summarize the engineering trade-offs, we use this matrix at JXD to guide our clients’ decisions.
| Feature | Type II (Decorative) | Type III (Hardcoat) | JXD Recommendation |
| Thickness | $0.0001″ – 0.001″$ ($2.5 – 25 \mu m$) | $0.001″ – 0.003″$ ($25 – 75 \mu m$) | Use Type II for electronics chassis. Use Type III for gears, slides, and wear parts. |
| Hardness | ~300-400 HV (Soft) | 60-70 HRC (Hard) | Type III provides true abrasion resistance. |
| Dimensional Growth | Negligible (~$0.0002″$) | CRITICAL (~$0.001″$ per side) | Must adjust CAD/CAM offsets for Type III. |
| Color Options | Infinite (Clear, Black, Blue, Gold…) | Limited (Black, Natural Grey/Bronze). | Design for Black or Natural Grey if choosing Type III. |
| Roughness (Ra) | Minimal change | Increases Ra by 2-3x | Finish to Ra 8-16 if you need Ra 32 final. |
| Cost | Baseline ($) | 2x – 4x Cost ($$$) | Only spec Type III if the performance justifies the cost. |
| Dielectric Strength | Good | Excellent | Type III is an excellent electrical insulator for heatsinks. |
11. Conclusion: Specifying for Success
The difference between a failed prototype and a production-ready component often lies in the fine print of the finishing note. At JXD, we want your parts to succeed the first time.
Do not write: “Anodize Black.”
Do write: “MIL-A-8625 Type III, Class 2 (Black), Thickness $0.002 \pm 0.0004$ inch. Mask threaded holes. Pre-anodize finish Ra 16.”
Summary Checklist for Engineers:
-
Function First: If it slides, rubs, or wears, use Type III. If it is static and cosmetic, use Type II.
-
Calculate Growth: Decrease your shaft ODs and increase your bore IDs by $0.001″ – 0.002″$ before releasing the drawing.
-
Manage Roughness: Specify a finer surface finish (Ra 8-16) for sealing surfaces to account for oxide roughening.
-
Accept the Color Palette: Embrace the industrial Black or Natural Grey for Hardcoat. Do not fight the chemistry by asking for bright colors.
-
Identify the Environment: If this is a medical part, explicitly state the sterilization requirements so we can adjust the seal chemistry.
Ready to Manufacture?
We specialize in catching these DFM issues before they become Friday afternoon nightmares.
Upload your 2D/3D drawings to JXD today. Let our engineering team review your coating specs, calculate the tolerance stack-up, and deliver a part that fits perfectly, every time.
