

When you receive a quote from JXD, you might pause when looking at the finishing line item. You might ask: “Wait, why did the price triple just because I changed the spec from MIL-A-8625 Type II to Type III?”
It sounds like a typical vendor markup, but as JXD’s Chief Application Engineer, I can assure you: This is not about profit margins. In fact, the net margin for machine shops on Type III (Hardcoat) is often lower than on standard Type II.
We see this confusion dozens of times a week. Today, I am going to open the doors to the anodizing floor and show you exactly where your money goes. We will break down the real costs—energy, time, and risk—to help you decide: Does your part actually need this expensive armor?
The Cost Breakdown: Why Type III is an “Energy Monster”
Many procurement managers assume anodizing is just “dipping parts in acid and adding electricity.” While the chemistry is similar, the physical environment required for Type III is drastically different from Type II.
A. The Energy Battle: Fire vs. Ice
-
Type II (Standard): The acid bath is kept at a comfortable room temperature (~68°F / 20°C).
-
Type III (Hardcoat): We must force the bath temperature down to 32°F (0°C) or lower.
Why? Hardcoat requires extremely high voltage (up to 100V) to force a dense oxide layer to grow. This generates immense heat. If we don’t use industrial chillers to keep the bath at freezing temperatures, the acid would instantly dissolve the coating, leaving a ruined, powdery surface.
The Cost: We are paying for both the high-voltage power и the massive refrigeration energy to fight that heat.
B. Time is Money: Tank Occupancy
In manufacturing, time is the most expensive resource.
-
Type II Cycle: ~15 to 20 minutes.
-
Type III Cycle: 60 to 90 minutes.
To achieve the standard hardcoat thickness of 0.002″ (50 microns), the part must sit in the tank for over an hour. This means that in the time it takes to finish one batch of Hardcoat parts, a shop could have finished four batches of standard anodizing. You are essentially paying “rent” for the tank time.
C. Fixturing and Scrap Risk
Type III requires 3x-4x the current density of Type II. We cannot use cheap aluminum spring clips. We often must use:
-
Titanium Racking: Expensive, durable fixtures.
-
Bolted Connections: Every part must be tightly bolted to the rack to ensure perfect conductivity.
The Risk: If a connection is loose, the high voltage will create an arc, causing a “burn mark”. This instantly scraps the part. This higher risk factor must be calculated into the unit price.
Decision Matrix: Do You Actually Need Type III?
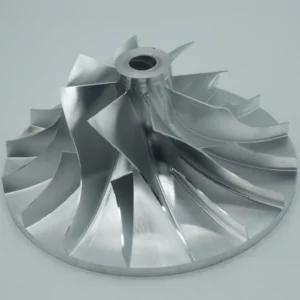
Type III Hardcoat offers a surface hardness comparable to hardened tool steel (60-70 HRC). It is impressive, but is it necessary?
Use this checklist to check your ROI (Return on Investment):
| Application Scenario | Recommended Finish | Why? |
|
Sliding / Rubbing Parts (Gears, Pistons, Sliding Rails) |
Type III (Hardcoat) | Mandatory. Type II will wear off in minutes under friction. Type III is required for wear resistance. |
|
Corrosion Protection Only (Outdoor brackets, Housings) |
Type II (Standard) | Save your money. A properly sealed Type II coating passes the 336-hour Salt Spray test easily. |
| Heat Sinks | Type III (Hardcoat) | Recommended. Thicker oxide layers provide higher emissivity (heat radiation) and excellent electrical insulation. |
| Disposable Medical Devices | Type II (Standard) | Cost Priority. For single-use items, Type III is “over-engineering.” |
How to Lower Your Costs (Smart Buying Tips)
If your engineering team determines that Type III is non-negotiable, we can still help you control costs at the DFM (Design for Manufacturing) stage.
Strategy A: The Hybrid Assembly
Do not anodize the entire assembly if you don’t have to. Design a two-part system:
-
Make the wear component (e.g., the rail) out of Type III Hardcoat.
-
Make the structural base out of Type II Anodize or Chem Film.
-
Bolt them together. This is often cheaper than hard-coating a massive, complex block.
Strategy B: Avoid “Selective” Hardcoat
We often see drawings that say: “Hardcoat inside the bore, standard anodize everywhere else.”
Please avoid this. This requires manual masking (applying liquid mask or plugs by hand), which is incredibly labor-intensive. The labor cost of masking often exceeds the cost of the anodizing itself. It is usually cheaper to Hardcoat the entire part.
Strategy C: Embrace the Natural Color
Do not ask for “Bright Red” or “Yellow” Hardcoat. Because the natural Hardcoat layer is dark grey/brown, dyeing it bright colors results in a muddy, inconsistent finish that leads to high rejection rates.
The cheapest and safest options are:
-
Natural (Dark Grey/Greenish – varies by alloy).
-
Black (The most uniform option).
Заключение
Type III Anodizing is expensive because it is not just a color—it is a ceramic shield grown onto your metal through an energy-intensive process.
If you are unsure if your project requires this level of protection, don’t guess.
[Contact JXD for a Free DFM Analysis]
Our engineering team at JXD will review your application and tell you exactly where you can save money with Type II, and where you absolutely need Type III to prevent failure.